
This tutorial explains how to rotate any wheel on its X axis based on its Y location. Or the other way around. In this example, we'll be rotating it on its X axis. Scroll down for the step-by-step guide. In order to see the video, you'll probably need to click the button below first to allow play back from YouTube. If this doesn't work for you, here's a link to the video: https://www.youtube.com/watch?v=_GZrC0s8DGY
Below are the same instructions as above, but this time with screenshots to illustrate each step.
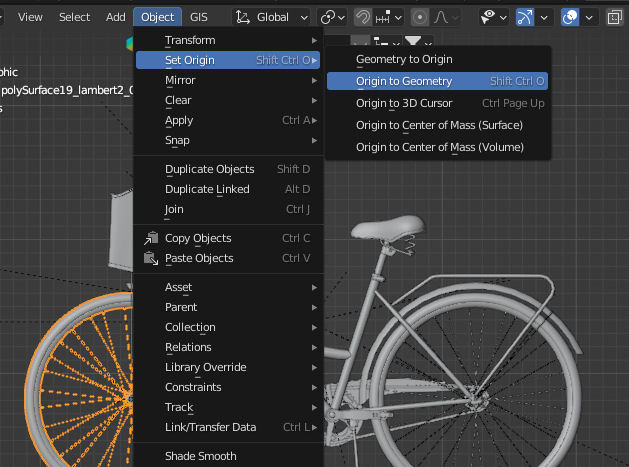
First, make sure that the wheel will rotate on the X axis and stay on the same location. Or, in other words, that the wheel origins are set to geometry.
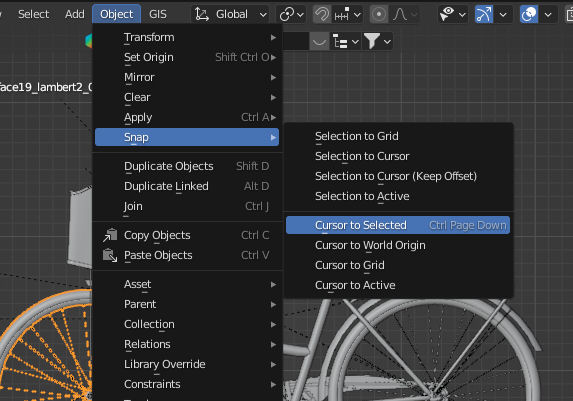
Snap the 3d cursor to the wheel's new origin point, which should be the center of the wheel.
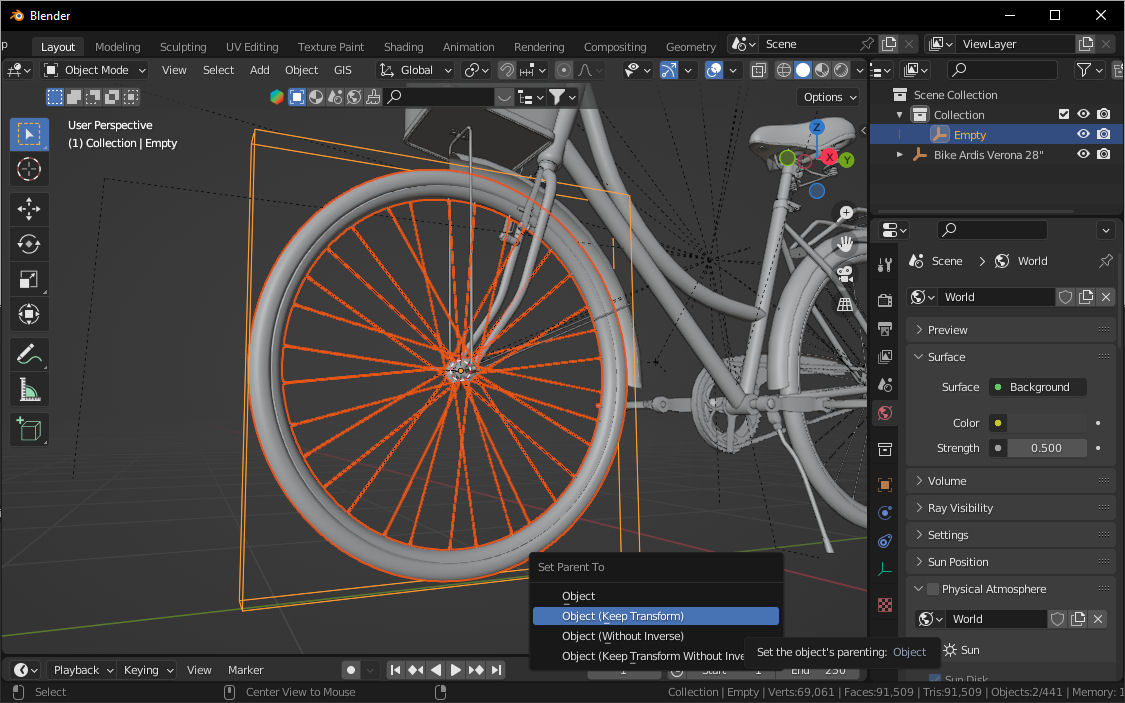
Add an "empty" cube, and resize it to fit the wheel's outer edges.
Parent the wheel to this new empty, and optionally parent the empty to the vehicle the wheel belongs to. So when we move the vehicle on it's Y axis, the empty and the wheel will move along with it.
Now select the wheel and under the constraint menu in the sidebar add a "transformation" constraint to the wheel.
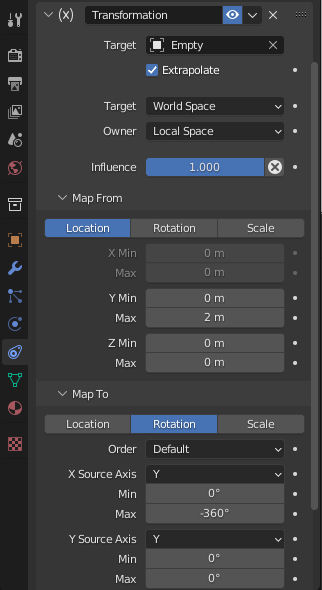
Set the target object to the empty cube, enable "extrapolate", and set owner to local space. Unfold "map from" and "map to" and set it "map from" to location, and "map to" to rotation.
Under map from set the max for the Y to something like 2. Under map to change the X to Y, and under the max value set to -360 degrees.
What we did here is set the wheel to rotate minus 360 degrees whenever the empty has moved two meters on the Y axis. Try it out by selecting the empty and moving it on the Y axis. The wheel should now rotate along with it.
In order to have the wheel rotate perfectly, there's something else we need to do. Although this is not required, it will look a lot better in animations.
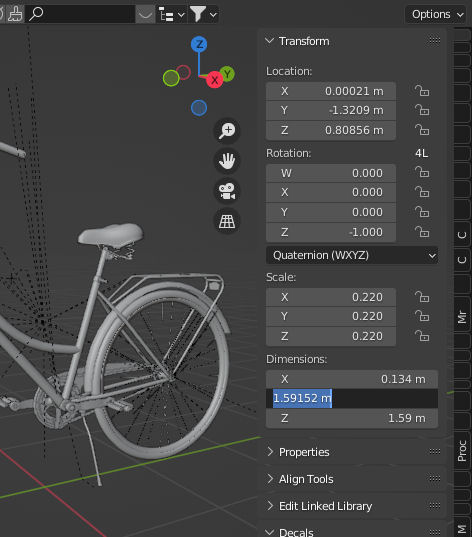

Select the wheel, and copy the value that is shown under the Y field for its dimensions. Divide this number by 2 by using your brain or a calculator. Copy the outcome and open this website: https://www.omnicalculator.com/math/circumference
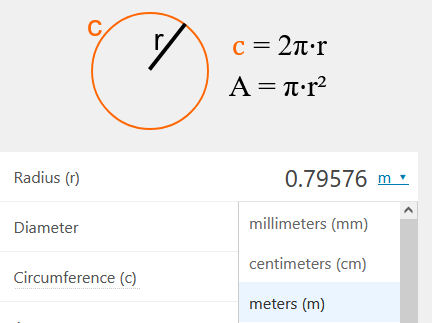
Now paste the value we just copied into the Radius field, and set it to Meters instead of Centimeters. A new value will appear under circumference. Copy this number and go back to Blender.
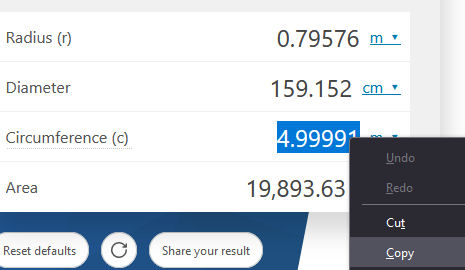
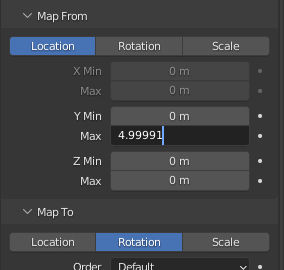
Paste it in the max Y value for the transformation constraint that we set to 2 earlier.
Now try to move the empty again on the Y axis and notice how the wheel now rotates a lot more realistic.

 VisieStudio